Fix Media: x86-64 / GModCEFCodecFix Guide (Windows)
Visual Install Guide:
Step 1
First, close Garry's Mod.
Then open Steam, and right click Garry's Mod from your Library games list. Select Properties from the menu.

In the Properties window, select "Betas", then click on the Dropdown menu and select "x86-64 - Chromium + 64-bit Binaries"
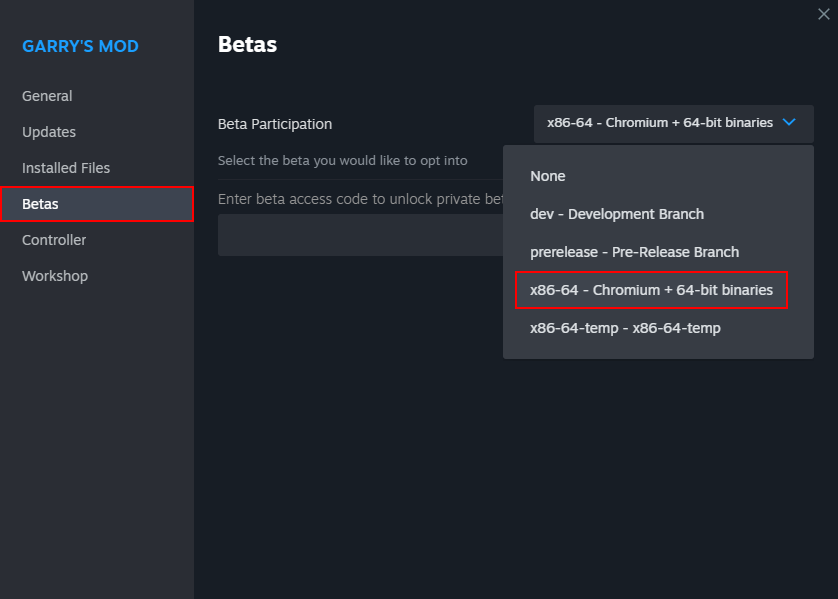
Now you can close the properties window and wait for the update to download. Once it's done, proceed to the next step.
Download the Latest Release of GModCEFCodecFix for Windows.
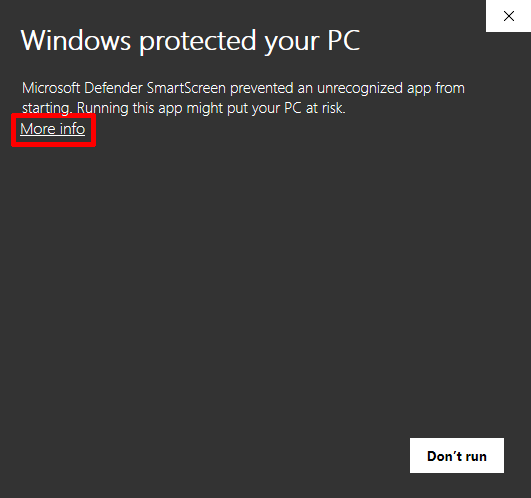
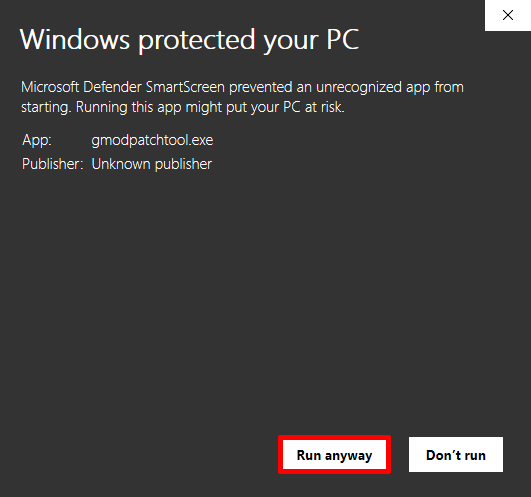
Extract all of the files from GModCEFCodecFix-Windows.zip, then run GModCEFCodecFix.exe. You may have to allow the app through Windows SmartScreen.
Proceed to the next step.
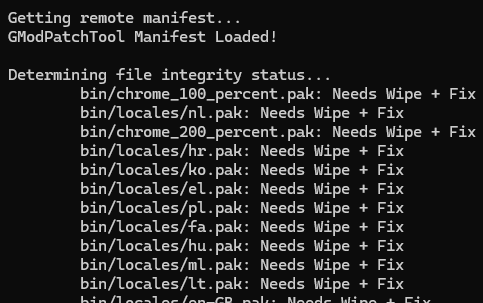
GModCEFCodecFix should now patch Garry's Mod. It may take some time depending on your internet connection speed.
Once it's done, you can launch the 64-bit version of GMod from the GModCEFCodecFix window by typing the number that corresponds to it and pressing Enter.

-tools launch option) or you have a 32-bit processor.
Congratulations, you're done! 🎉
Tip: To make sure you remain patched and up to date, we recommend launching Garry's Mod through GModCEFCodecFix each time.
It is typically also safe to launch it from your Steam Library after it's been patched, however other ways of launching it may force Steam to perform a file integrity check.
If a file integrity check happens, or GMod gets an update, the patches may be removed and you will have to run the tool again to restore them.
💖 If you found this tool useful, consider throwing a few dollars our way! Our work is 100% funded by users of the tool!
❓ Having Trouble?
- Check out the FAQ
- Join our Discord
- Email us: [email protected]
⚙ Advanced Options
Proceed to the next step if you'd like to see Advanced Options for:
- Installing on unsupported versions of Windows
- The Auto-mode feature
Auto-mode Feature
ℹ This enables you to use the GModCEFCodecFix as a launcher without having to input a number to launch GMod when it finishes.
- Right click on the GModCEFCodecFix-Windows.exe you previously downloaded and select Create a Shortcut. This Shortcut can be put anywhere on your PC.
- Right click on your new Shortcut and select Properties.
-
From the Shortcut tab in the Properties window, find the Target text field.
At the end of the text field, after GModCEFCodecFix-Windows.exe, add a space, then the text
-a 2.After you apply this change, using this shortcut will automatically launch 64-bit GMod. (Use
-a 1if you need to launch 32-bit GMod instead.)
Installing on unsupported versions of Windows
Warning: Windows 8.1/8/7 and earlier are End of Life and no longer supported by Microsoft.
We highly recommend upgrading to a supported operating system instead of using this workaround. It may cease to function in the future.
- Download and install Python 3.8 (3.9+ cannot be used on Windows 7 or earlier). During installation, add it to your system PATH in the Advanced Setup Options.
- Download and install Git for Windows.
- Download and install Visual C++ Build Tools, ticking the box labelled "Desktop Development with C++".
- Restart your PC to finish installing Visual C++ Build Tools when prompted.
-
Open Command Prompt and run the following commands, in order:
cd C:\git clone https://github.com/solsticegamestudios/GModCEFCodecFix.gitcd GModCEFCodecFixpip install -r requirements.txt -
If all goes well, you should now be able to run the script in Command Prompt:
python GModCEFCodecFix.py
To update and run the tool again in the future, using a batch file is recommended. We recommend putting the following in a file named RunGModCEFCodecFix.bat for easy use:
@echo off
cd C:\GModCEFCodecFix && git pull && python GModCEFCodecFix.py